|
|
|  Download Compiled Demos Download Compiled Demos | |
RVMedia Showcase
These demo projects do not contain source code, but source code location in the RVMedia installation is specified.
You must agree to the license before you may download the demo projects.
Download
File size: 72.6 MB. Last updated: November 26, 2024.
Read the install/uninstall instructions and the privacy statement.
If you are interested in compiled TRichView, ScaleRichView, and ReportWorkshop demos, please visit TRichView Showcase page.
In RVMedia installation, the demos are located in the following folders:
- Demos\Delphi\ for Delphi VCL
- Demos\Delphi.FMX\ for Delphi FireMonkey
- Demos\Lazarus\ for Lazarus
Content
- Cameras (displaying videos from various sources)
- Sending and receiving (peer-to-peer connections)
- Media server (client-server connections)
- Recording (audio and video files)
1. Cameras
|
| Video from a single camera |
|

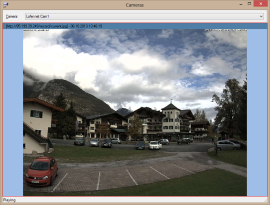
The most basic demo: showing video from a single camera.
The combo box at the top of the window contains a list of cameras. It includes local cameras (USB webcams) and several cameras accessible via the Internet.
The same list is used in (almost) all other demo projects. Not all cameras may be online when you run a demo – if some camera does not work, just skip it and try another one.
The demo uses two components: TRVCamera and TRVCamView.
Location of this demo in the RVMedia installation: Cameras\CamList\
|
| Image filters |
|

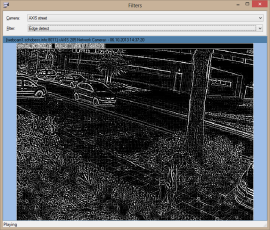
The demo shows how you can modify video frames before displaying them.
The demo applies some sample image filters to video frames (sharpen, edge detect, emboss, blur).
Note: the blur filter is quite slow.
Location of this demo in the RVMedia installation: Cameras\Filters\
|
| Camera control |
|

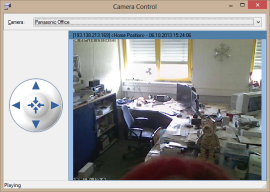
This demo shows how to control a camera movement.
A list of cameras in this demo is limited to controllable cameras.
Note 1: A movement control can be turned off for some cameras.
Note 2: You may be not the only person who controls a camera at the same time, so do not wonder if the camera moves randomly.
The demo offers two ways to control cameras:
- a special control (at the left side of the window) – TRVCamControl
- by clicking in the camera viewer itself (you will see special arrow cursor showing the direction of rotation)
Location of this demo in the RVMedia installation: Cameras\CamControl\
|
| Motion detection (old version) |
|

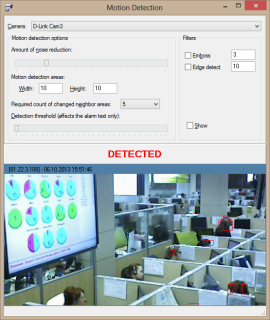
This demo shows how to implement a simple motion detection.
This demo implements a simple algorithm for detecting motion by comparing frames and finding changed areas.
You can change parameters to find optimal settings for specific cameras:
- noise reduction: allows to ignore pixels which were changed insignificantly;
- motion detection areas: a frame is separated into areas of the specified size; changes are found in each area separately;
- required count of changed neighbor areas: allows to ignore changes in areas if adjacent areas are not changed;
- detection threshold: specifies how many areas must be changed to show an alarm message ("detected!");
Note: This motion detection algorithm is implemented for demonstration purposes only.
It's not very good, mostly because it uses a fixed grid of areas, so changes belonging to a single area have much more chances to be detected
than changes belonging to multiple areas.
Location of this demo in the RVMedia installation: Cameras\MotionDetect_Old\
|
| Motion detection |
|

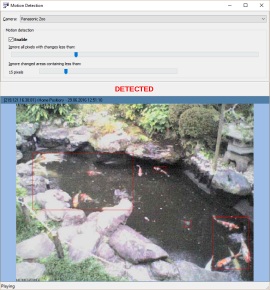
This demo shows how to use RVMedia motion detection feature.
You can change parameters to find optimal settings for specific cameras:
- ignoring pixels that were changed insignificantly
- defining minimal allowed size of changed areas
Location of this demo in the RVMedia installation: Cameras\MotionDetect\
|
| Web camera |
|

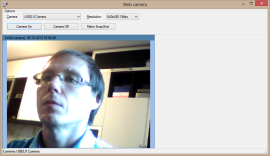
This demo shows how to display video from a local camera (such as USB webcam) and change its video modes.
Note: Not all video modes listed in this demo can be set. Results depend on the camera model.
Location of this demo in the RVMedia installation: Cameras\WebCamera\
|
| Video from several cameras |
|

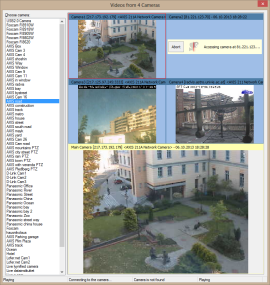
This demo shows how to display videos from several cameras. It uses TRVCamMultiView component.
The demo contains four small panels and one larger main panel. Click one of small panels, then click a camera in the list to play in this panel.
The main panel displays video from the selected small panel.
The component displays video for the main camera with higher frame rate (so, when you select another camera that is already playing,
the component may reconnect to the camera, requesting video with a higher frame rate)
Location of this demo in the RVMedia installation: Cameras\CamListMulti\
|
| Searching for cameras |
|

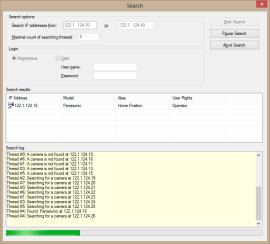
This demo searches for cameras in the specified range of IP-addresses.
Location of this demo in the RVMedia installation: Cameras\Search\
|
| MediaTest |
|

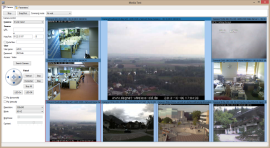
This is the most complicated demo in this set.
It displays videos from multiple cameras, and allows to configure cameras.
In addition to cameras added to a sample list, you can enter camera address manually.
Notice tabs “Users” and “Parameters” – they appear for cameras that can be configured.
Location of this demo in the RVMedia installation: Cameras\MediaTest\
|
|
2. Sending and receiving video
Below you can find compiled demo projects showing how applications can send and receive data via the network, including video, audio, and other data (such as commands and files).
|
| Send and receive: SingleApp demo |
|

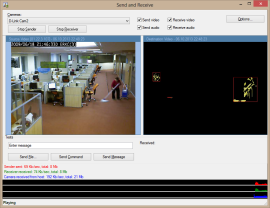
How to test: select a video source from “cameras” combobox. Video will be displayed in the left panel.
Click “Start Sender” and “Start Receiver”.
Video will be sent via the network to this application itself, and received video will be displayed at the right side
(well, you can run two copies of this application, start a sender in one application and a receiver in another one; but it's simpler to test in a single application).
In addition to video, this demo sends to itself audio data read from a microphone. Also it can send a file, a message and a test command.
You can change options for sending video and audio in the “Options” dialog
(this dialog is not modal; changes are applied when you click “Apply” button).
You can change image encoding – Jpeg or HWL (HWL is in a beta stage).
By default, whole frames are sent. But you can change settings to send only changed fragments.
Move the trackbar “ignore all pixels with changes less than...” to define sensitivity. To understand results visually, check “Test mode”.
In this mode, test pictures are sent; they show changed pixels and areas that would be sent in a non-test mode.
The options dialog also allows changing settings for a microphone:
- “amplitude” can increase sound volume
- noise reduction
- “min level” allows ignoring too quiet sound
- “ignore interval” allows ignoring a monotonous hum
- “voice change” can change a voice pitch
At the bottom of the main window you can see statistics and charts for data received from IP camera(s), data sent by sender, data received by receiver.
This is TRVTrafficMeter component. It is useful to find optimal settings – you can see how various options affect traffic.
This demo uses the components:
- TRVCamera for receiving video from cameras
- TRVMicrophone for reading sound from a microphone
- TRVMicrophoneView to show a microphone activity
- TRVCamSender to send video, audio, files, text messages and commands
- TRVCamReceiver to receive them
- 2 TRVCamViews to display videos (from the camera and from the receiver)
- TRVTrafficMeter to show statistics
Location of this demo in the RVMedia installation: SendAndReceive\SingleApp\
|
| Send and receive: TwoApps demo |
|


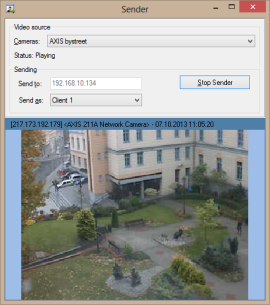
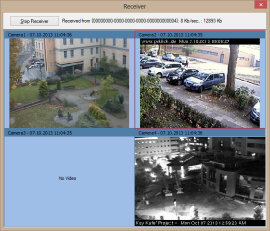
This demo consists of two applications: a sender and a receiver.
Run the receiver, click “Start Receiver”.
Run the sender. Choose a video source from the combo box. Click “Start Sender”.
You can launch up to 4 senders, but before starting sending, choose a different item from “Send as” combo box for each sender.
These applications can run on a single computer or on different computers connected via the Internet.
By default, “Send to” text box contains the local address; if you run the demos on different computers, enter the receiver address in this text box.
Location of this demo in the RVMedia installation: SendAndReceive\TwoApps\
|
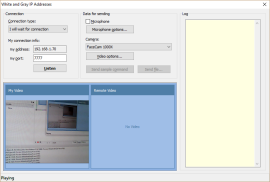
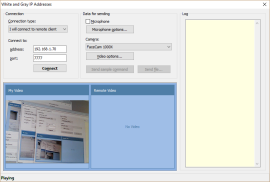
| Send and receive: TwoSides demo (“white and gray IP”) |
|


This demo shows how to transfer data (video, sound, files, commands) between two applications, without a server, even if one of them does not have an external IP address
(for example, it is behind a proxy).
This demo is a single application that can work in two modes:
- listening for a remote application
- connecting to a listening application
Data can be sent in both directions.
Location of this demo in the RVMedia installation: SendAndReceive\TwoSides\
|
| Send and receive: Remote Desktop |
|

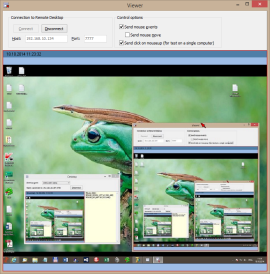
This demo consists of two applications: RemoteDesktop and DesktopControl.
Run the both demos, click the “Connect” button in DesktopControl.
RemoteDesktop demo sends screen images as a video stream; additionally, it sends the mouse pointer position. DesktopControl receives and shows this information.
DesktopControl can send mouse commands to RemoteDesktop, and RemoteDesktop executes them, simulating mouse events.
Location of this demo in the RVMedia installation: SendAndReceive\RemoteDesktop\
|
|
3. Media server
Below you can find compiled demo projects showing how applications can send and receive data via the network.
These applications consist of two parts: a server and a client.
Clients send and receive video (and other information) to each other via the network, but, unlike the demos above, clients are not connected to each other directly.
Instead, they are connected to a media server.
|
| Media server |
|

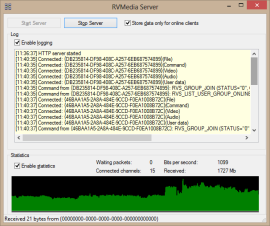
This application is used as a server for all clients in this (“VideoChats”) group of demo projects.
Run this demo and click “Start Server” button.
This demo uses TRVMediaServer component.
This server can work with all kinds of demo clients at the same time:
different types of clients do not interfere with each other
(it happens because “Chat” communicates only with clients belonging to the specific group on the server,
and “Messenger” and “Conference” communicate only with clients belonging to a predefined contact list;
while “Messenger” and “Conference” use the same user names in contact lists, user identifiers are different in these demos).
You can run these demos on the same computer or on different computers connected via the Internet.
Location of this demo in the RVMedia installation: ClientServer\VideoChats\Server\
|
| Chat |
|

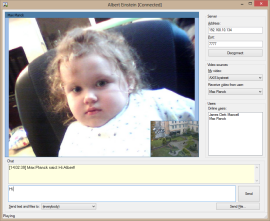
Video chat demo.
These applications connect to the media server demo (see above) and can send to each other: video, sound from a microphone, files, text messages.
By default, they connect to media server running on the same computer. If it is running on another computer, enter its address before clicking “Connect”.
You can choose video that you will broadcast to another users (“my video”). It will be displayed in the small panel.
You can also choose a chat user to receive video from (“receive video from user”).
Video from this user will be displayed in the large panel.
By default, text messages and files are sent to everybody. You can send them privately by choosing an addressee (“send text and files to”).
In this demo, all clients join to the specific group on the server. With minor modifications, this demo could implement chat rooms (they could choose a group to join).
Location of this demo in the RVMedia installation: ClientServer\VideoChats\Chat\
|
| Messenger |
|

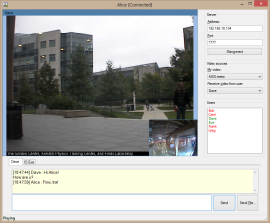
Another type of a video chat.
This demo looks very similar to the previous Chat demo. Messengers connect to the Media Server (see above) and send video, audio, text and files to each other.
Differences:
- Chat client generates a new unique identifier and allow to enter a new name for each new client;
Messenger logs in as one of predefined accounts (having a stored name and an identifier)
- Chat client enters to a group on the server and communicates with other members in this group.
Messenger communicates only to a fixed set of clients (from a contact list)
- Chat sends messages and files to all other members of the group (but can send them privately); messages are shown in a common chat text viewer.
Messenger sends text and files privately; it creates a separate chat text viewer for each user.
- Chat's user list contains online members of the group. Messenger displays all users in its contact list; offline users are red, online users are green.
Possibility to improve this demo: implement a contact list editing – request for adding to a contact list, deletion from a contact list, etc.
Location of this demo in the RVMedia installation: ClientServer\VideoChats\Messenger\
|
| Video conference |
|

One more kind of a video chat.
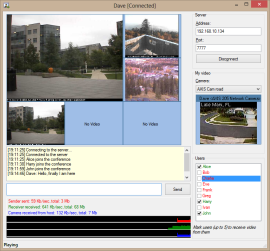
This demo is similar to the previous demo. Conferences connect to the Media Server (see above) and send video, audio and text messages to each other.
Like the Messenger demo, Conference client uses a contact list. It logs in as one of predefined accounts, and communicates only with other members of the contact lists.
Differences:
- Messenger displays video from a single user. Conference displays video from up to 5 users (checked in the list)
- Messenger uses a separate chat text viewer for each user; Conference uses a common chat text viewer for all users, like in the Chat demo
- Sending files and private messages is not implemented in the Conference demo
- Conference displays system messages in the chat viewer
- Conference displays a traffic statistic at the bottom of the window
Location of this demo in the RVMedia installation: ClientServer\VideoChats\Conference\
|
| Chat Rooms |
|
In this demo, users can either create a chat room or enter the existing chat room.
A room owner chooses a room member who will display video to all other room members.
Location of this demo in the RVMedia installation: ClientServer\VideoChats\ChatRooms\
|
| Lecture |
|

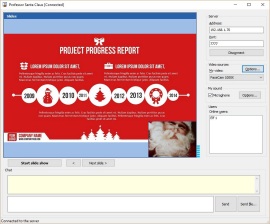
This demo consists of two projects: “Lecturer” and “Student”.
A lecturer displays his/her video to students. Students receive video from a lecturer.
This demo uses the following notable features:
- two video channels (a lecturer sends video from two sources: slides and a camera)
- custom video source (slides are taken from files and are sent as a video)
Location of this demo in the RVMedia installation: ClientServer\VideoChats\Lecture\
|
| Authentication |
|

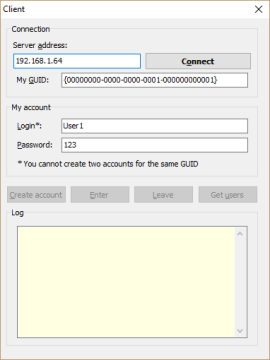
This demo shows how to implement a simple authorization on a media server, and how to store data about clients in a database.
It consists of two applications: a client and a server.
There are several versions of the login server available: BDE and FireDAC versions for Delphi, TDbf version for Lazarus.
Location of this demo in the RVMedia installation: ClientServer\Login\
|
|
4. Recording
Below you can find compiled demo projects showing how record audio and video files.
|
| Audio Recorder |
|

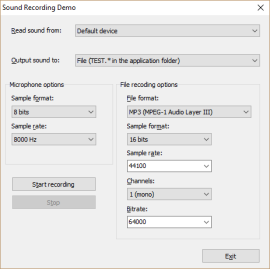
This demo shows how to record sound from the specified audio input device (microphone) and play it on the specified audio output device (speakers) or record to a file.
This demo requires FFmpeg for recording.
This application supports the following formats:
- WAV (Waveform Audio)
- MP2 (MPEG-1 Audio Layer II)
- MP3 (MPEG-1 Audio Layer III)
- AC3 (Dolby Audio Codec 3)
- Vorbis (OGG)
- FLAC (Free Lossless Audio Codec)
- Opus
- WMA (Windows Media Audio) v.1 and v.2
- AAC (Advanced Audio Coding)
- RealAudio 1
- G.723.1
- Speex
- WavPack
- ALAC (Apple Lossless Audio Codec)
- AMR (Adaptive Multi-Rate audio codec)
Availability of formats depends on the used FFmpeg library version.
Warning: some audio formats may be patent-protected in some countries, and supporting these formats will require from you obtaining licenses from the patent owners.
Location of this demo in the RVMedia installation: Recording\AudioRecorder\
|
| Video Recorder |
|

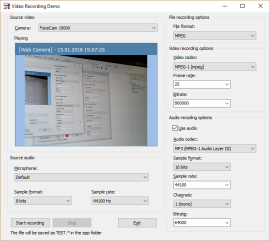
This demo shows how to record video (and, optionally, audio) to a file.
This demo requires FFmpeg.
This application supports the following formats:
- MPEG-1
- MPEG-2
- MPEG-4
- H.263+
- H.264
- MJPEG
- Windows Media Video 7 and 8
- FLV (Sorenson Spark)
- RV10 (RealVideo 1) and RV20 (RealVideo 2)
Availability of formats depends on the used FFmpeg library version.
Warning: some video and audio formats may be patent-protected in some countries, and supporting these formats will require from you obtaining licenses from the patent owners.
Location of this demo in the RVMedia installation: Recording\VideoRecorder\
|
| Recording MJPEG video |
|

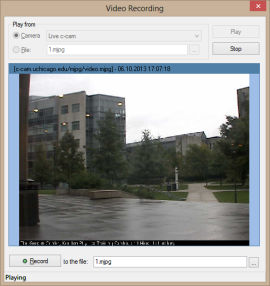
This demo shows how to record MJPEG video from a camera to a file, and how to play this file.
This application does not use external libraries.
Location of this demo in the RVMedia installation: Recording\MJPEG\
|
|
|

